• Luscious Chai
  • Bars, Cakes & Pies
  • Weddings & Events
  • About Luscious
  • Posts
  • Mmmm, that’s Luscious…

Luscious Pastry

~ Artisan baked goods and chai in Austin, TX ~

 Luscious Pastry

Category Archives: Uncategorized

Independence Day Cobbler with Buttermilk Ice Cream

01 Monday Jul 2013

Posted by lusciouspastry in Uncategorized

≈ Leave a comment

SONY DSCThe 4th of July is coming up, and look, y’all– Luscious doesn’t care about the statistics. We say the US is still #1! Not only did we create the Trans Am (*scroll to bottom) and the movie “Urban Cowboy”, we invented cobbler, dammit, and you can’t take that away. Almost 250 years after the birth of our nation, Americans are still proud to take fresh, wholesome fruit, and cook it with sugar until all the nutritional value is gone. The day that stops, well, that’s the day the we know that the terrorists have won.

So take that, other countries with your more impressive high school graduation rates, like Switzerland and New Zealand, and um, South Korea and Hungary, and also Slovenia, and several other nations that are kind of hard for Americans to find on a map. Your commitment to education doesn’t intimidate us, because on Independence Day, the citizens of the US color-coordinate our cobbler and ice cream with our flag. U-S-A! U-S-A!

Cherry Blueberry Cobbler with Buttermilk Ice Cream
We love creamy buttermilk for many reasons, here it balances perfectly with fruit and pastry. This ice cream has a sweet, tangy, and complex flavor that’s perfect on top of a bowl full of warm juicy cobbler.

For the Ice Cream:
Make the ice cream first, it needs to sit in the freezer for a good while. Have your ice cream maker ready to go, and read those manufacturer’s instructions.
1 cup whole milk
1 tablespoon cornstarch
1 cup heavy cream
½ cup brown sugar and ½ cup white sugar,
½ teaspoon salt
¼ cup light corn syrup
2 cups buttermilk

Whisk together a little of the milk with the cornstarch until the lumps are gone, then pour the cornstarch mixture, the rest of the milk, the cream, sugar, salt, and cornstarch into a sauce pan. Stir over medium heat until the sugar is dissolved and the mixture is uniform. Remove from heat, and pour into a large chilled glass or metal mixing bowl. Whisk in the buttermilk, and place in fridge for an hour or until the mixture is cool. Pour into the bowl of the ice cream maker and run until the mixture is noticeably thickened. Place into a freezer-safe container with a lid, and freeze for 3-4 hours, or overnight.

For the Cobbler:
First, make the dough!
2 ½ cups flour
2 tsp sugar
1 tsp salt
1 stick butter, cold and cut into pieces
½ cup vegetable shortening
1/2 cup ice water

cobbler doughWhisk together the dry ingredients. Then add the butter pieces, and work into the flour with a pastry cutter and/or your fingers until it starts to look crumbly. Then cut in clumps of shortening with a few quick swipes. The goal is to have a mixture that looks like breadcrumbs. When you’re at that point, drizzle most of the ice water over the dough and gently stir with a rubber spatula. The dough should start to come together at this point; if not, drizzle with the remaining water.

Divide the dough into two sections, roll into balls and flatten into thick disks. Wrap and plastic and refrigerate for at least an hour. You can make the dough up to this point a day ahead.

SONY DSCNow, turn your attention to your fruity filling. Have ready a 9×13 Pyrex dish, or similar baking dish, and pre heat oven to 375º.
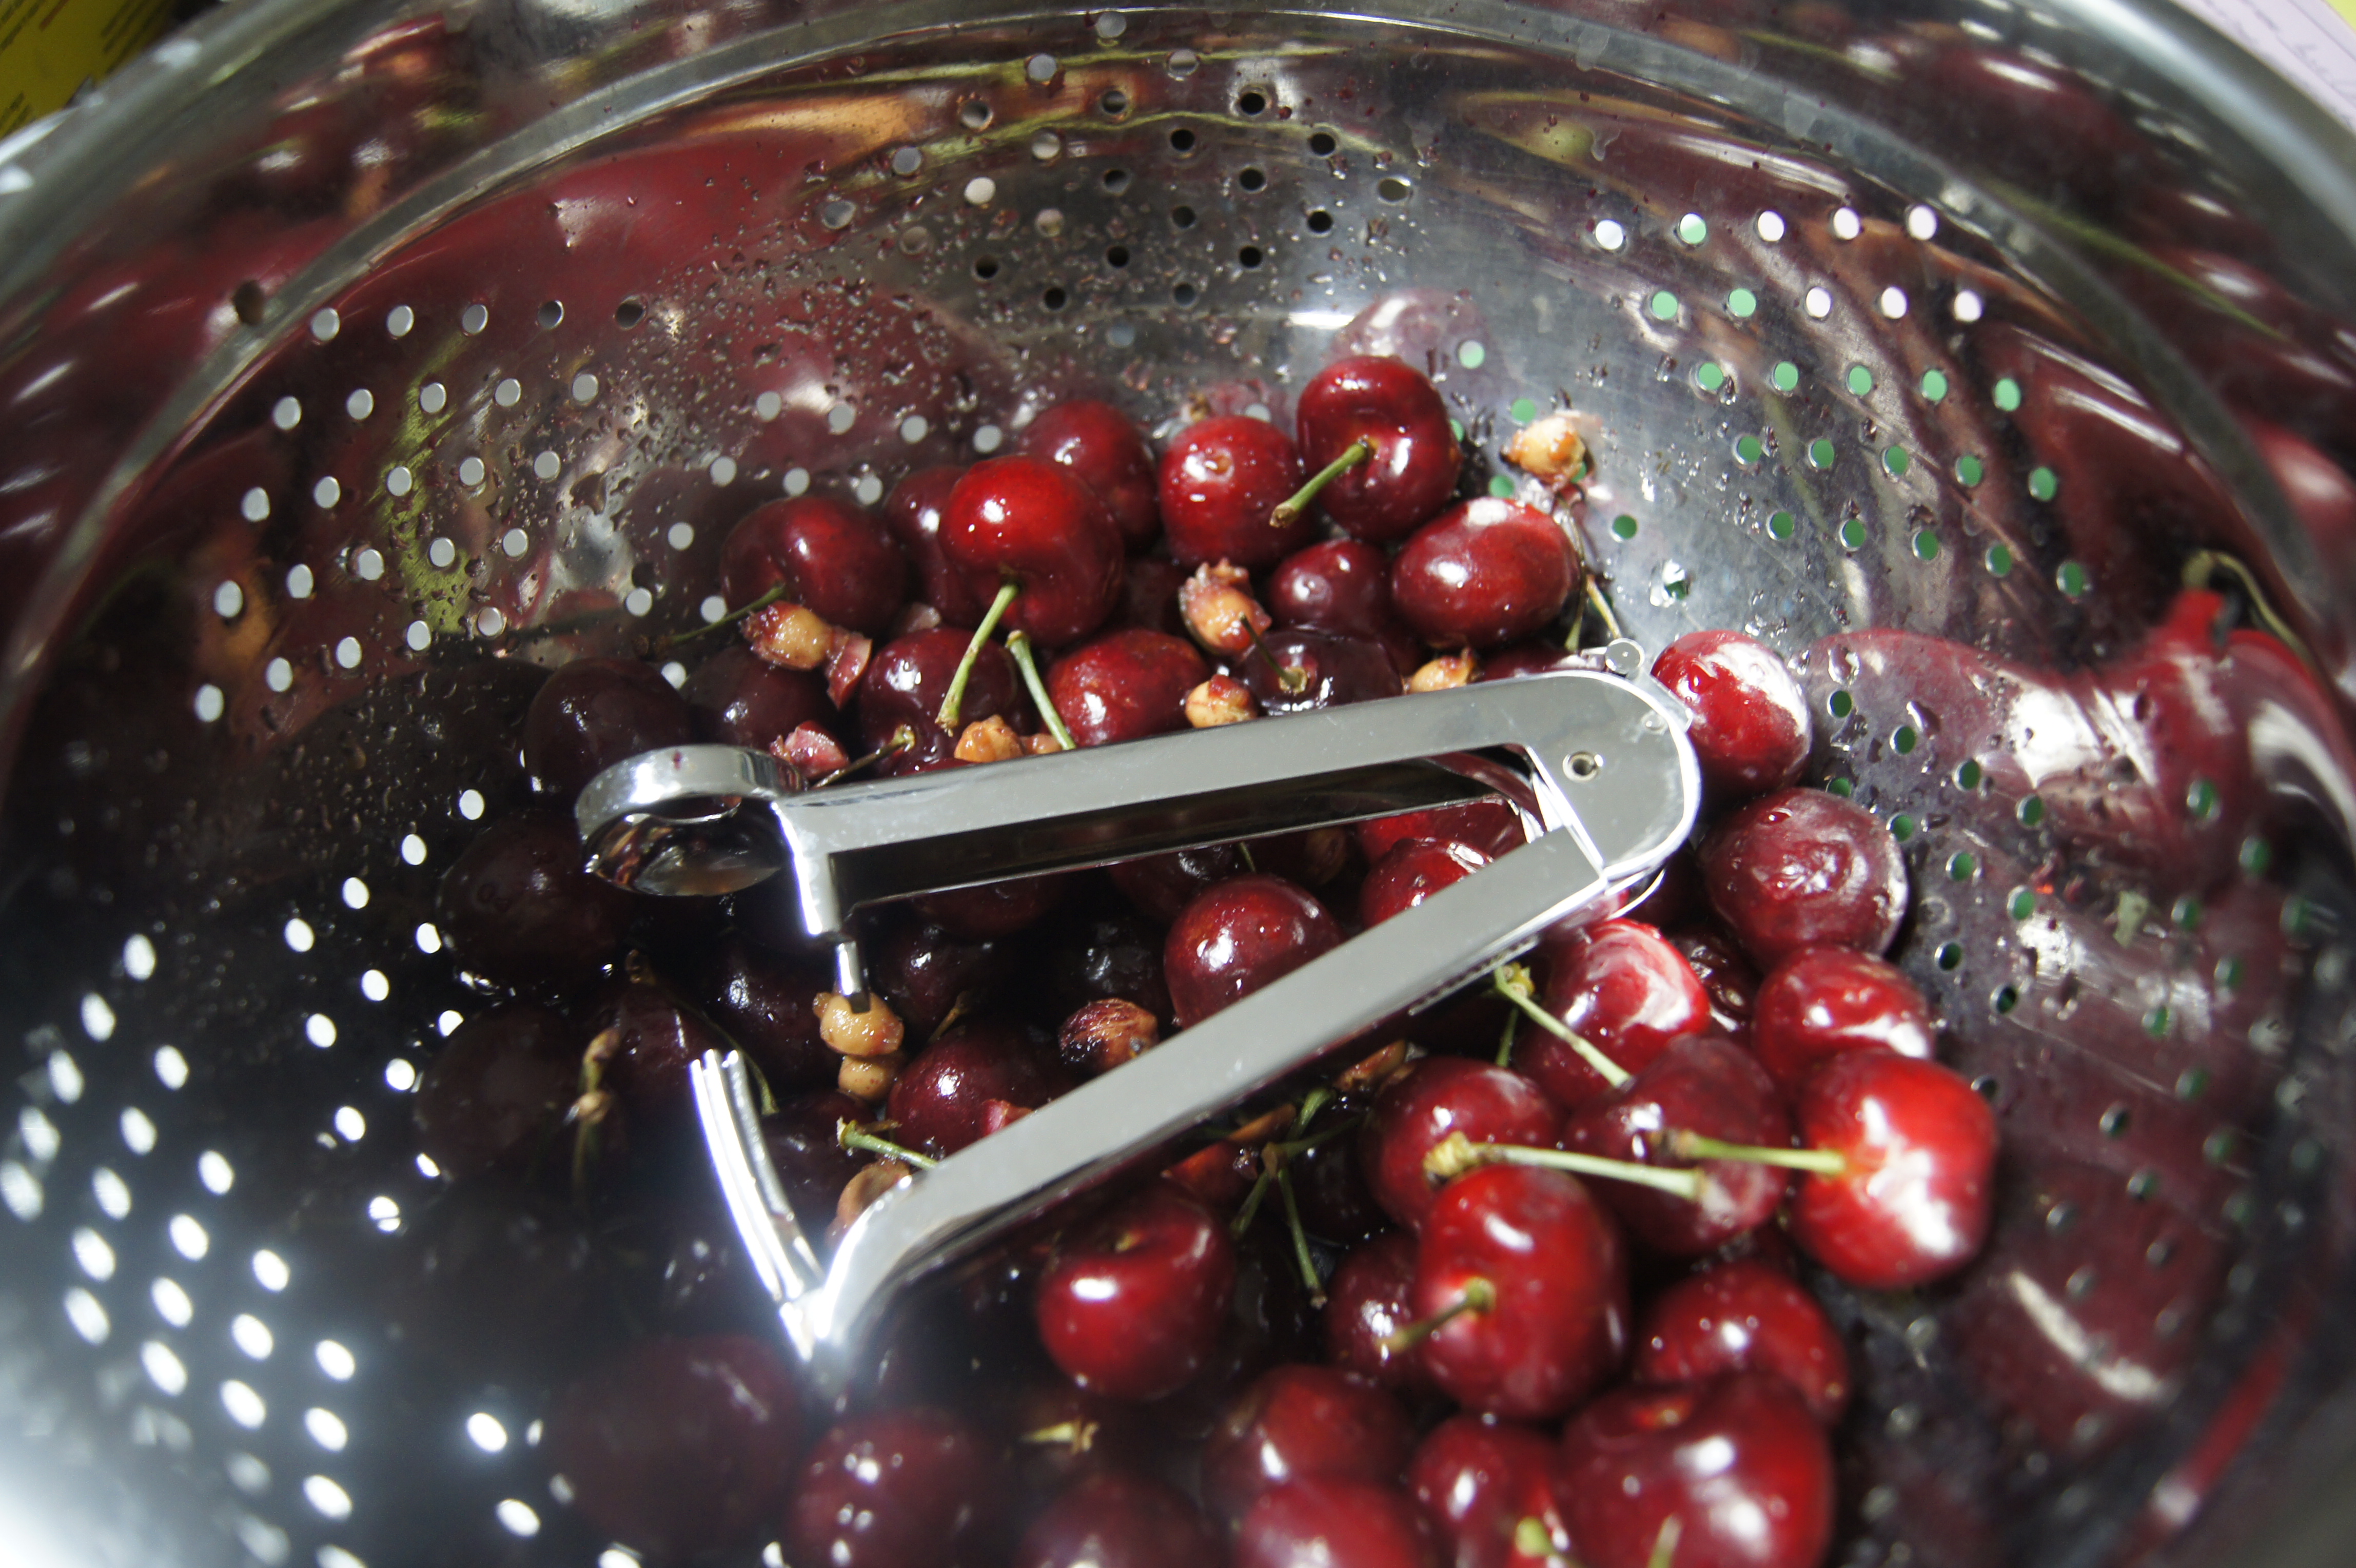
2 1/2 lbs fresh cherries, washed and pitted. (Try to blackmail a family member into pitting the cherries for you. Do they want cobbler or not?)
1 lb fresh blueberries
1 cup sugar
2 tablespoons cornstarch
1 tablespoon lemon juice

Mix all the filling ingredients in big bowl, preferably glass, and let sit for 15 minutes.

SONY DSC
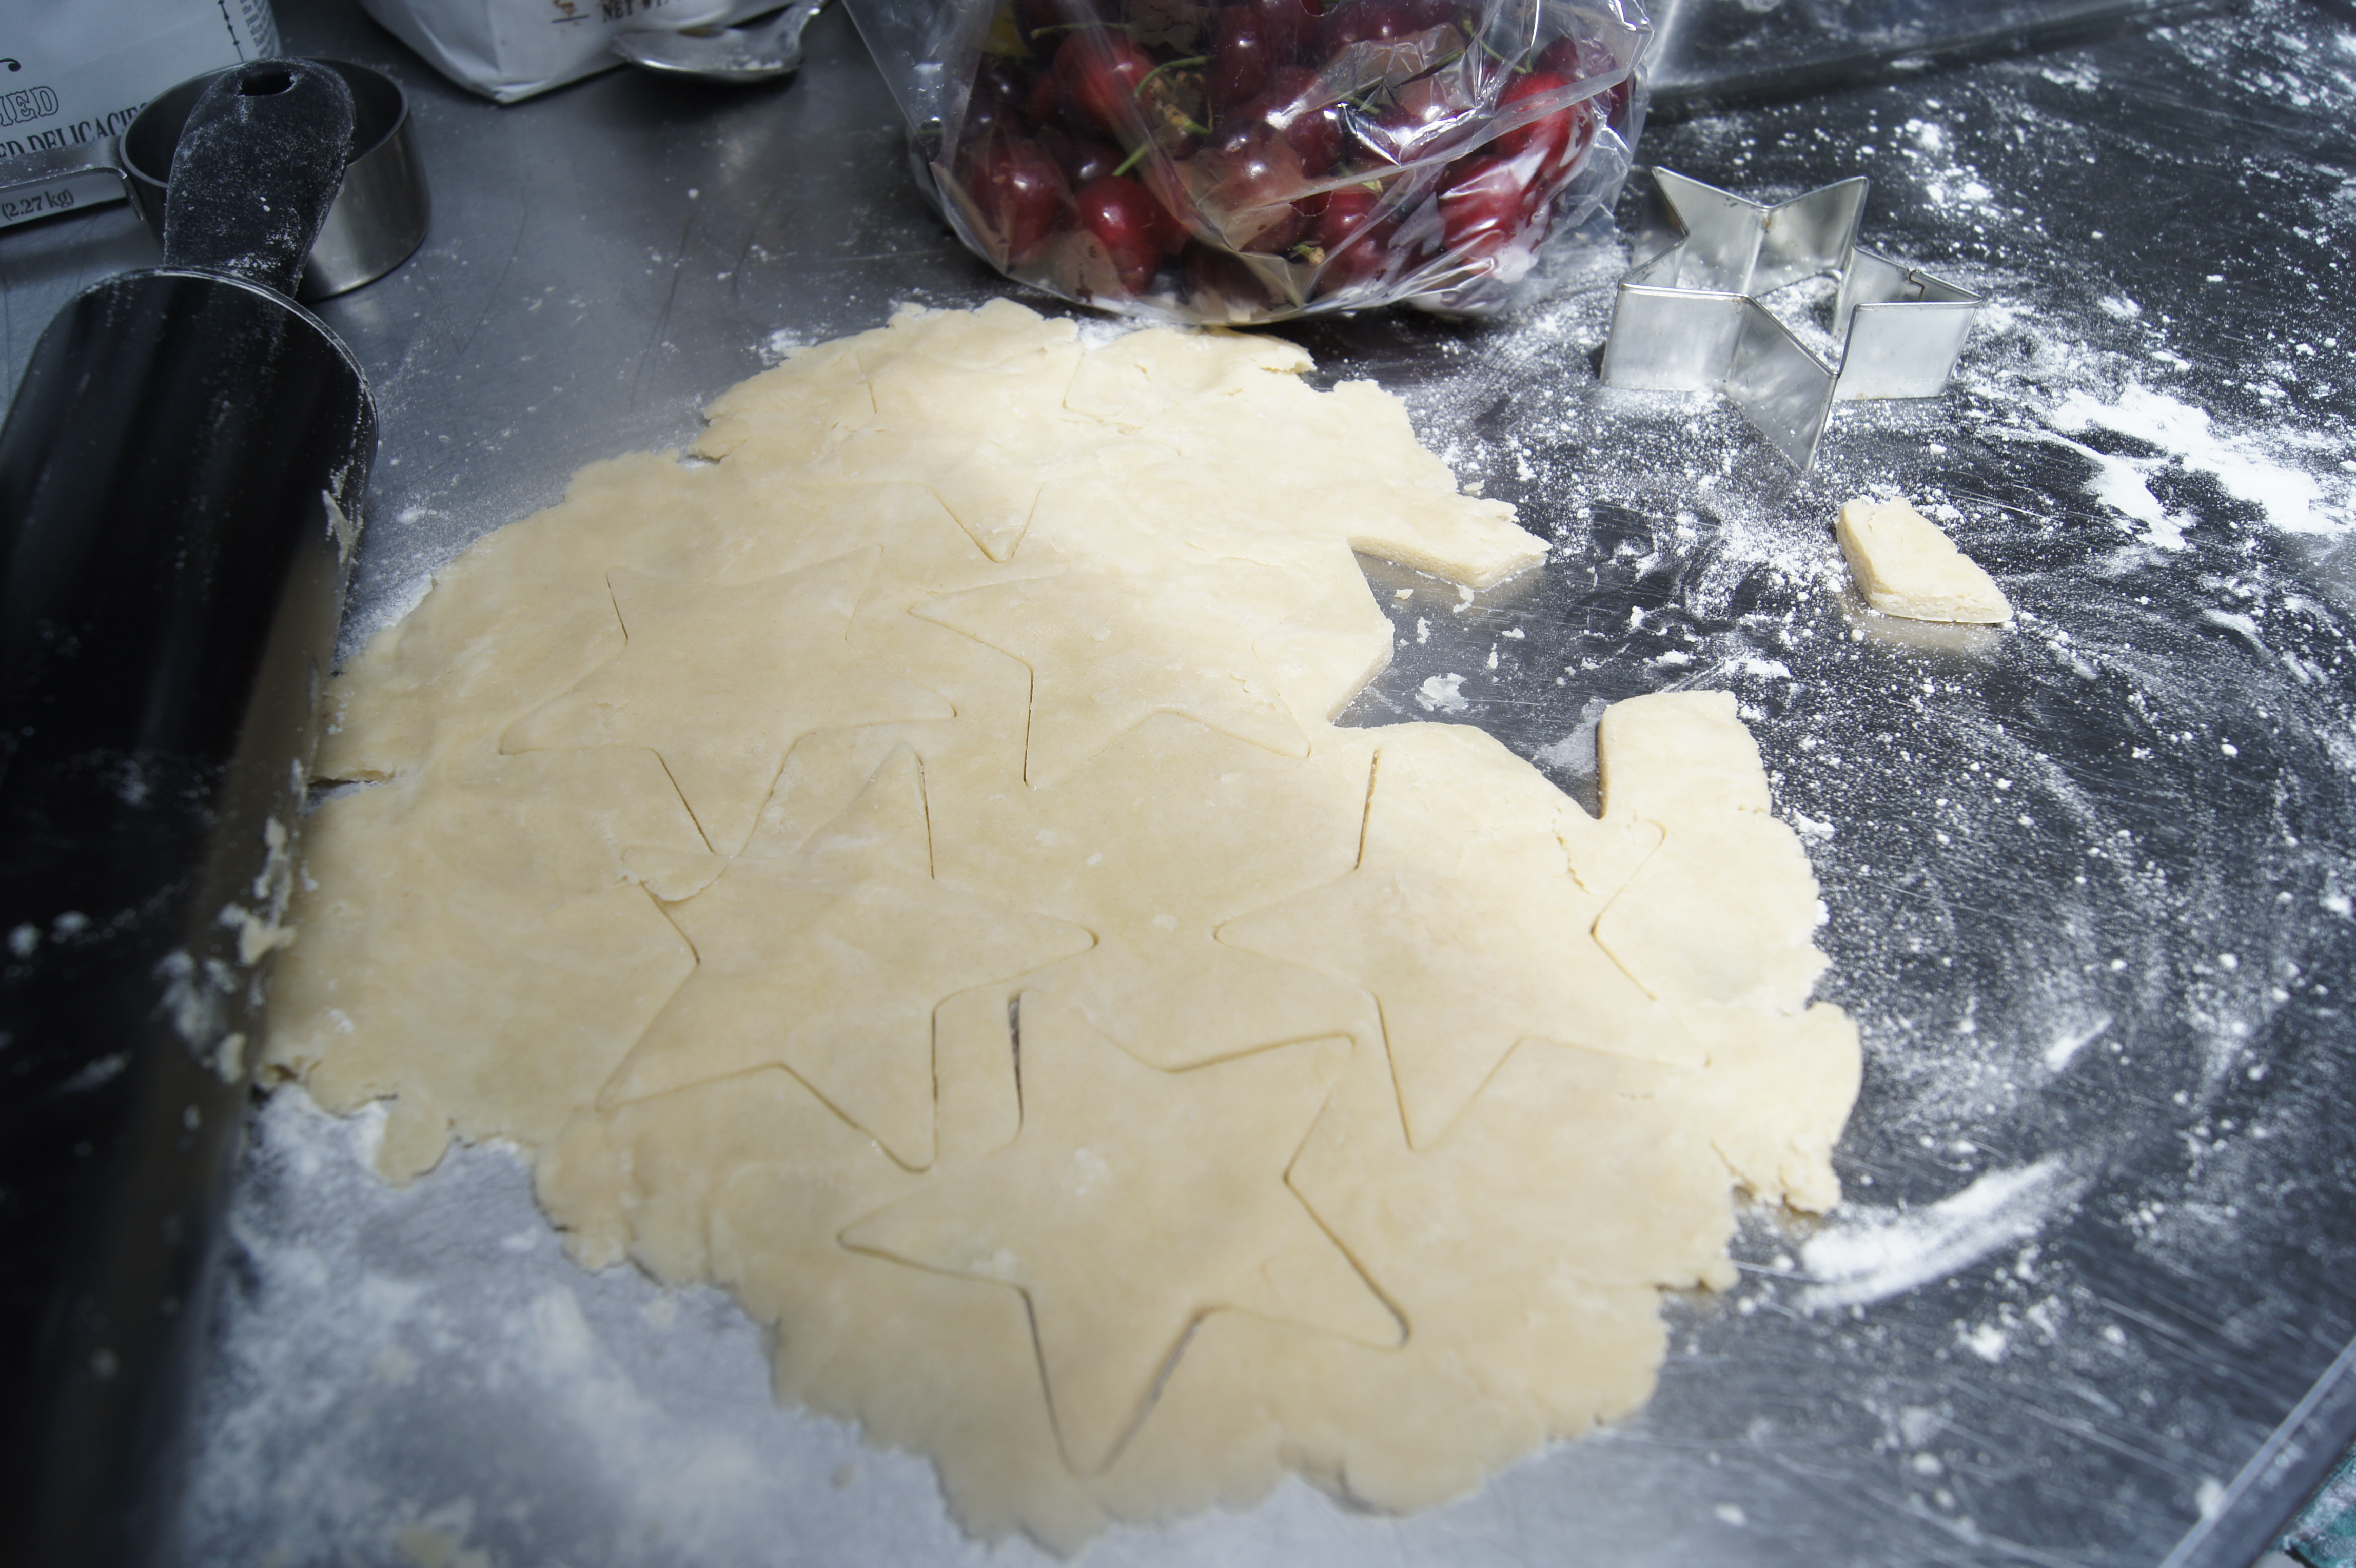
Take the dough from the fridge, and roll out on a floured surface until about ¼” thick. Use a cookie cutter to cut into shapes, we used stars to be holiday-themed. Gather and re-roll scraps as needed, but try not to overwork the dough.
Pour the fruit into the Pyrex dish and arrange dough shapes on top.

Optional: brush dough with a beaten egg or milk, and sprinkle with white decorating sugar. Sparkly!

Bake for 50-60 minutes until fruit juices are bubble and thick, and crust is golden brown. Let cool a bit, then serve with buttermilk ice cream.

SONY DSC

* Eat while watching Trans Am burnout videos on You Tube. God Bless America.

Lemon Cornmeal Cake with Strawberries and Cream

20 Monday May 2013

Posted by lusciouspastry in Uncategorized

≈ Leave a comment

Okay, we’re not gonna lie. You’ll see that the photos of the cake are cropped. Hmmm, why can’t we see the whole cake? That is because this cake is SO GOOD that a certain Luscious baker ATE a piece before there was a chance to take photos. We won’t say who, because we’re sure she is VERY SORRY, but that’s what happens when you have someone with two first names in your organization.

SONY DSCBut hey, it’s like this: when locally grown strawberries are ripe and in season, they are so perfect as is, it’s a shame to cook them.  Strawberry shortcake is a classic presentation for fresh berries, but we love the tastes, textures and colors of this pretty cake even more: golden butter cake with a subtle cornmeal crunch, tart lemon syrup, fluffy whipped cream, and those juicy red berries. You might have to eat a piece before dinner, too- call it Quality Assurance.

SONY DSC

Butter cake pans, and dust with cornmeal.

for the cake
2 cups all purpose flour
¾ cup cornmeal
2 ½ teaspoons baking powder
¾ tsp baking soda
½ tsp salt
2 sticks butter, softened
1 ¾ cups sugar
4 eggs
juice and zest of 1 large lemon
1 cup buttermilk

for the syrup
juice and zest of 3 large lemons
3/4 cup water
1 cup sugar

1 lb strawberries, rinsed
1/3 cup sugar

1 cup heavy cream, very cold (it will whip up better when cold)
2 tablespoons powdered sugar

Preheat oven to 350º. Prepare two 9” round cake pans: grease pans and dust with cornmeal.

SONY DSCThoroughly whisk together the flour, cornmeal, baking powder, baking soda, and salt in a medium bowl.  In a large bowl, beat butter with a hand mixer until fluffy, then mix in the sugar. Add eggs one at a time. Scrape sides of bowl with a spatula. Mix in juice and zest of one lemon. Add flour mixture in three parts alternating with buttermilk in two parts. Pour batter into prepared pans and bake for 25-30 minutes until golden and an inserted toothpick comes out clean with just a few crumbs. Allow cakes to cool.

Mix together the juice and zest of 3 lemons, the water, and sugar in a small saucepan, cook over medium heat until bubbling. When cakes are cool, carefully remove from pans by running a thin knife around the side of the pan and invert each cake on to a plate. Poke all over with a toothpick, and pour half the lemon syrup over one layer, and the remaining syrup over the other layer.  Allow syrup to soak in for 15 minutes before assembling cake.

Slice berries– thick slices are good, or just cut small berries in half. Place in a glass bowl and toss with 1/3 cup sugar.

Using a handmixer, whip the cream with the powdered sugar until thick.

Assemble the cake: spread one layer with 2/3 of the whipped cream, then place 2/3 of the berries over the whipped cream. Place the 2nd cake layer on top. Place remaining whipped cream on top of the 2nd layer, and and top with remaining berry slices. Serve immediately, or refrigerate until serving time.

Lemon_cornmealcake

Eat it up!

Acorn Squash Tart with Arugula and Bacon

22 Friday Feb 2013

Posted by lusciouspastry in Uncategorized

≈ Leave a comment

Tags

recipe, vegetarian, winter squash

Acorn Squash Tart with Arugula and Bacon

Acorn Squash Tart with Arugula and Bacon

Here’s a tasty, savory vegetable tart, just like your grandma used to make. That is, if your grandma was a hipster yuppy from Brooklyn. Actually, Brooklynites might not eat this, because it has gluten and of course arugula is so 2008. Luscious is not a hipster  and has never been to Brooklyn, so we really don’t know what the hell we’re talking about. Except, hey Brooklyn, we heard you’re full of yuppies.

But seriously, it’s okay. Acorn and arugula together in a tart sounds slapably pretentious, but don’t go hatin’, they’re just vegetables. The fruity, nutty squash is rather gloriously offset by the earthy arugula. Our Texas garden arugula is spicy hot!  If  all you can get is some kind of sissy arugula, you could sub in kale or some mustard green leaves. Bacon on top keeps it real.

Have ready a 9″ tart pan with removable bottom or a glass pie pan.

For the crust:
Don’t be afraid to make your own crust, it’s so worth it, and this is an easy one. Cream cheese dough has a lot of flavor and is cooperative. Those crusts from the grocery store are full of weird chemicals that will turn you into Lindsay Lohan. (Although, we love Lindsay, because she makes Luscious look like we have our $h!t together.)

1 1/4 cup flour
1 tsp sugar
1/8 tsp salt
4 ounces cream cheese, cold and cut into pieces
6 tablespoons butter, cold and cut into pieces
2-3 tablespoons cold whipping cream

Whisk together the flour, salt, sugar, then cut in the cream cheese and butter. You could use a food processor here, but be super careful not to overmix.  Luscious like to use a pastry cutter until all the big chunks are gone, and then we use our very clean fingers to work the mixture until it resembles crumbs. Drizzle on the cream and mix with a spatula until it all starts to stick together. Get your hands in there again and work it into a big ball. Take your big dough ball and set it in the middle of the tart pan, flattening into a disk, and slowing but surely working it up the sides so you have an even thickness on the bottom and side. Look at that, you didn’t even have to roll out the dang dough. Stick that in freezer for 15-20 while you work on the filling, pre-heat over to 350º.  Take the crust out of the oven, line with aluminum foil and fill bottom with pie weights or dried bean, back for 20 minutes.

For the filling:
1 big Acorn squash, heavy for it’s size. Yes, you can use Butternut, but we’ll know you’re just doing it because you like to say “butternut.” We get it.
2 tablespoon olive oil
1 medium yellow onion, chopped
1/4 tsp nutmeg, a little more if you like that flavor
salt and pepper
1/2 cup water
3 slices bacon
1 1/2 cups chopped arugula, the hotter the better!
1 egg
1 cup heavy cream
3 tablespoons blue cheese crumbles
Peel, seed, and chop acorn squash into 1″ cubes. Heat oil over med-high heat in the skillet, and add onion and squash. Sprinkle with nutmeg. Cook for several minutes stirring often until squash cubes get some nice brown caramelization. Sprinkle a little salt and ground pepper over squash. Add water to the skillet, stir, lower heat, and cover. Cook until squash is tender enough to cut easily the side of the spoon. Remove cooked squash mixture to a big glass bowl, and allow to cool a bit.

Cook the bacon in the same skillet until crisp. Drain bacon on paper towels and chop.  Pour all but a tablespoon of the bacon grease, turn up the heat and toss in the arugula. Stirring often, flash fry for a little less than a minute. Set aside.

Beat egg with cream, and mix into squash, stirring until well mixed.  Evenly spread mixture into baked tart crust. Bake at 350º for 20-25 minutes, until the filling has firmed up a bit.

Sprinkle arugula, bacon, and blue cheese, in that order, over squash, bake for another 10 minutes. Allow to cool about 7-10 minute, slice and serve. Your Brooklyn hipster yuppy grandma will be proud.

We Give Thanks for Rum

16 Friday Nov 2012

Posted by lusciouspastry in Uncategorized

≈ Leave a comment

Thanksgiving is bearing down upon us yet again, so Luscious has a kickass pumpkin pie recipe for you lucky ducks.  Rum Raisin Pumpkin Tart with Gingersnap-Oatmeal Cookie Crust. Yeah! It has a long name, ’cause it’s fancy!  Actually, it’s easy to make, but no, it’s NOT your traditional homey pumpkin pie. So we realize that it’s not the pie for everyone. At the holidays, some people love eating the same comforting recipes passed through the generations because it warmly reminds them of happy times with extended family. That must be nice. If, at family holiday get-togethers, you don’t find yourself thinking “well, that was awkward”  and “are those peas in that pineapple jello salad?” and “thank God I hid a flask my purse this year”, then this isn’t the blog for you. Go away and enjoy your functional family, and  let the rest of us weep into this pie we’re making:

raisins

Rum-soaked raisins

Rum-Raisin Pumpkin Tart with Gingersnap-Oatmeal Crust

This is really pretty made in a 9″ tart pan with removable bottom, but if you’re ghetto and make in a pie pan, Luscious still loves you. Pre-heat the oven to 400 degrees.

First things first

Put 3/4 cup raisins into a small glass bowl. Pour dark rum into a tall glass, then pour enough of the rum over the raisins to cover. What happens to the rest of rum? We think you can figure it out. Let the raisins soak for an hour or more.

For the crust:
1 cup all-purpose flour
1/2 cup crushed gingersnaps
1/4 cup uncooked oats
1/2 teaspoon salt
1 stick of room-temp butter cut into small pieces
3 tablespoons cream

pie crust

Gingersnap Oatmeal Cookie Crust

Whisk together the dry ingredients. Cut in the butter with a pastry cutter. Luscious is not afraid to use our fingers to work in the butter. Get it looking like coarse crumbs, don’t over mix.  Drizzle over a couple of tablespoons of the cream, and gently stir and press together with a rubber spatula or wooden spoon. When the cream is mixed in and the mixture coheres, place in your pan and press evenly on the bottom and up the sides. Prick the bottom and sides with a fork, then bake for 15-18 minutes until it starts to look light toasty brown. When you take out the crust, lower oven temp to 375 degrees.

For the filling:
2 eggs, beaten
1 can pumpkin puree or 2 cups cooked mashed pumpkin
8 oz sour cream
1/4 cup cream
1/2 cup white sugar
1/4 cup brown sugar
1/2 teaspoon salt
1 teaspoon ginger
1 teaspoon cinnamon
1/2 teaspoon nutmeg

This part is so easy. But sort of hurry because it’s helpful if your pie crust is still fairly hot when you pour in the filling. Mix everything together, how easy was that?  Get those raisins, draining off any excess rum (into your mouth). Fold raisins into pumpkin mix. Pour filling into crust (don’t overfill– if you have extra you can pour it into ramekins and bake alongside the pie.) Bake at  375 degrees for 35-40 minutes or so until the filling is firmish but still quivers a little when you nudge the pan.  Let cool before serving.

pumpkin pie

Your sister-in-law is gonna be so jealous.

Brownies this weekend!

08 Thursday Nov 2012

Posted by lusciouspastry in Uncategorized

≈ Leave a comment

Image

They look that good because they are.

Luscious friends, we know that what with the fiscal cliff and the elections and all the Facebook fights you’ve had to witness (or start), it’s been a tension-filled week. Luscious Pastry wants to help you manage stress, and since we don’t have a liquor license, we’re offering our decadent Fudgy Sea Salt Brownies this Friday. Because Chocolate Makes It Better.  Box of 6 big brownies for $14, or box of 4 for $11.  Order at yummy@lusciouspastry.com by tomorrow (Friday) at 10am, pick up 4:30-6:30 pm at Luscious World Headquarters in the Crestview area.

Somebody still loves you, Gluten.

27 Friday Jan 2012

Posted by lusciouspastry in Uncategorized

≈ Leave a comment

Tags

chocolate souffle recipe, pro-gluten stance, trans-am

piecrusts courtesy of your friend, gluten

Hey Gluten, what did you do to make everybody hate you so much? If you want to know, Luscious is a little touchy about all the gluten-free hype that’s gone on for while. Now truly, some individuals have serious gluten allergies, and for them, the Luscious gals are very happy about all the gluten-free foods now available. But there’s a lot of trash talk going on about poor Gluten, and Luscious finds that irksome (irksome was not the word Anne-Charlotte used.) Gluten is cool. Gluten is, like, magic. Gluten, the naturally developing wheat protein that gives us chewy breads and flaky pie crusts, is a badass.

Jennifer says "Kiss My Am"

Oh, food trends. Luscious suspects that some of these gluten-haters are the same people dissing much-maligned Dairy just so their friends will think they’re cool. Anne-Charlotte and Jennifer  know that a lovingly made apple pie coming out of the Luscious oven is about two million times better for you than hunk of soy cheese driven to your store in 18-wheeler.  And the girls will crank up the Foghat, drive their Trans Am to the parking lot of the trendiest gluten-free vegan establishment in San Francisco, and stand on the hood  loudly proclaiming it to every hipster going in.  That’ll show ’em.

Okay, okay, okay. Luscious does actually make gluten-free desserts. The girls are a little fearful of gluten-free flour (what do you have to do to get the gluten out? Pact with the devil?) but some classic desserts are naturally flourless.  Luscious’ amazing chocolate truffles and meringue cookies are like crack, available for order anytime you need to free yourself from gluten.  And they make a absolutely killer chocolate souffle, but tragically, it will never be part of the Luscious menu: this delicate treat starts to deflate within a minute of coming out of the oven, so must be eaten immediately. So you can either come over to the House of Luscious and eat your souffle right there, or… make your own. Need a fabulous chocolate soufflé recipe? Voila! (that’s French for “keep scrolling.)

Luscious Chocolate Orange Soufflés
Makes individual souffles for 4 lucky ducks

Ingredients
3 large eggs.  (Get the freshest eggs you can, they’re pretty much the main ingredient)
4oz bittersweet chocolate, chopped. (The other main ingredient, so mess around here either.)
3 Tbsp butter
1 tbsp orange liqueur (we like Paula’s Texas Orange)
1 tsp orange zest (optional)
1/8 tsp cream of tartar
1/2 cup sugar

Firstly, butter 4 lovely ramekins, then dust the sides and bottom with sugar. This will give your little souffles something to grab ahold of as they bake up. Pre-heat the oven to 375 degrees.

Then separate the eggs. Yeah, it’s kind of a pain, so just get it over with. If you’re OCD like Luscious, wash your hands about 20 times during this process to prevent salmonella contamination. The whites should go in a medium-sized bowl, you’ll beat these in a bit so you need some room. Going ahead and beats those lovely yolks.

Yolks and whites, separate but equal.

Put the chocolate, butter, and orange liquer in a large glass bowl. Melt in a double boiler, or microwave in 15 second increments, stirring in between microwavings, until melted and smooth. Don’t try to get crazy and go for 30 seconds just to see what happens. What will happen is, you’ll waste a bunch of good chocolate by scorching it. When it’s melted, set aside for 10 minutes to cool.

Mmmm. choco-licious.

Now, get going on the egg whites. Beat on medium speed until foamy. No, a little foamier than that– give it another minute. Then add the cream of tartar and beat until soft peaks form. Next, add the sugar GRADUALLY and keep beating just until you get stiff peaks. That’s what she said. Hey, look, it’s meringue!

Look at those egg whites now!

Stir the egg yolks into the cooled chocolate. Stir in about a third of the meringue, then fold in the rest until just incorporated. Be gentle here, to preserve the structure of the meringue you just spent time on.

Butter 4 individual ramekins, then dust with sugar. Evenly distribute the chocolate mixture among the ramekins.  At this point you can cover with plastic wrap and refrigerate for up to a day and half. (This makes an awesome make ahead dessert for a dinner party.)  When you’re ready to serve, pop ’em in the oven, bake for 20 minutes until puffed and set. For the love of God, don’t open the oven until you’re pretty sure they’re done.  Dust with powdered sugar or drizzle with orange sauce (see below). Eat, eat!

Puffy and creamy and chocolately, couldn't you just die?

Orange Sauce
2 tablespoons orange liquer
zest and juice of one orange
3 tablespoons orange marmalade
dash of ginger (optional)
Combine all ingredients in a sauce pan, cook on medium heat until bubbly and somewhat reduced, about 10 minutes.

← Older posts
Newer posts →

The Luscious Blog

  • Cherry Amaretto Cobbler with Molasses Ginger Ice Cream
  • Rosewater Angel Food Cake with Fresh Strawberries
  • Vegan Shortbread Cookies with Chai Glaze
  • Póg mo Thóin Irish Coffee Brownies
  • Sweetheart Jam Cookies

You know you like it.

You know you like it.

Luscious Pastry tweets

Tweets by LusciousPastry

Contact us!

yummy {at} lusciouspastry.com
1.512.797.5034
Custom orders filled 7 days a week.

Blog at WordPress.com.

Privacy & Cookies: This site uses cookies. By continuing to use this website, you agree to their use.
To find out more, including how to control cookies, see here: Cookie Policy
  • Subscribe Subscribed
    • Luscious Pastry
    • Already have a WordPress.com account? Log in now.
    • Luscious Pastry
    • Subscribe Subscribed
    • Sign up
    • Log in
    • Report this content
    • View site in Reader
    • Manage subscriptions
    • Collapse this bar
 

Loading Comments...